This is an old revision of the document!
Table of Contents
Getting Started with ProtoWeb
To start using ProtoWeb, all you need is a computer with an Internet connection and a web browser that supports HTTP and FTP proxies (almost all web browsers do!). You can use a direct connection to the Internet. All you need to do is add the Proxy Server addresses in your Web browser setting.
By using any of the ProtoWeb services, you agree to the terms outlined in the User Agreement.
Introducing ProtoWeb
RetroTech Chris recently made a video that showcases several ways to browse ProtoWeb! Thank you, Chris!
Quick Start

- Make sure the computer is connected to the Internet.
- Install a web browser in case you haven't done so already. You can use any web browser that supports HTTP and FTP proxies. To see a list of tested browsers, check out our comprehensive list.
- For the best experience, we recommend using the service with the following web browsers (depending on your platform):
- Windows 3.x: Netscape Navigator 3.0, Internet Explorer 3.0, Opera 3.0
- Windows 95/98/Me/NT4: Netscape Navigator 4.5, and Internet Explorer 4.0.
- Windows 2000/XP: Internet Explorer 6.0
- Modern Windows: RetroZilla 2.x, please refer to the article Classic Web Browsers on Modern Computers for more information.
- Start the web browser and go to it's Network Settings. In Proxy settings, add ProtoWeb as your default proxy server under HTTP and FTP proxies. Refer to the Proxy Server List for current proxy servers.
- Now you can use the service. Navigate to http://welcome.inode.com/ to begin, or go to http://www.inode.com/ to view the full index of accessible domains.

Dial-up Experience
If you want to simulate the page load times from back in the day (or perhaps are slightly deranged) you may want to choose a proxy server which simulates a 56k modem. If you would like the full Windows Dial-up experience, including dialing phone numbers, you may want to build the Raspberry Pi Virtual Modem. See Raspberry Pi -based Virtual Modem for more information.
Detailed Instructions for Individual Web browsers
For the purposes of scope of documentation, we can cover a limited set of vintage web browsers, but the setup is similar with all browsers.
Netscape Navigator 3.0
- Open Netscape Navigator and go to Options ⇒ Network Preferences
- Open the tab Proxies
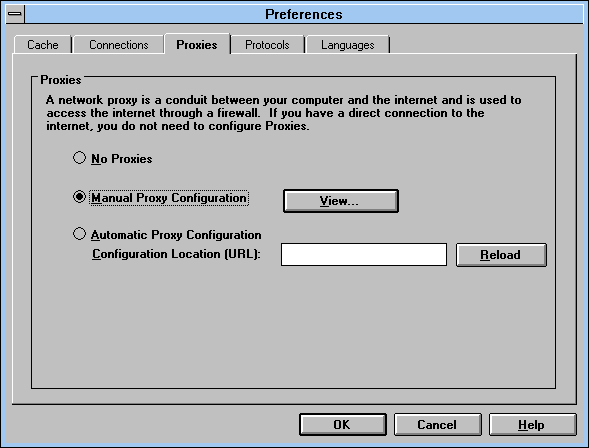
- Under FTP Proxy, Gopher Proxy and HTTP Proxy type in the address
wayback.steptail.com - Under Port type in the port number of your chosen server. Consult the server list and choose a port number.
- Hit OK, then OK again to close out of the Network Preferences window.
- You may begin using the service by navigating to http://welcome.inode.com
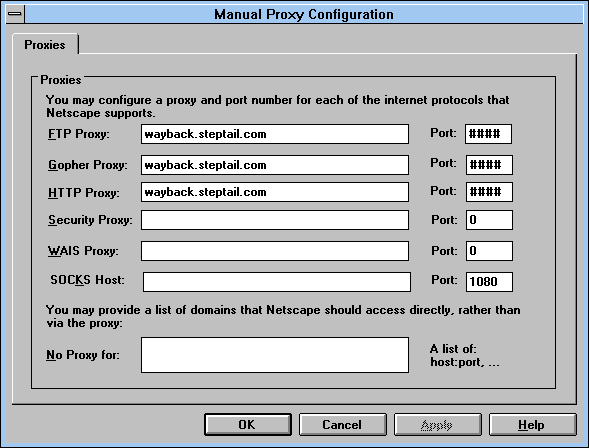
Netscape Navigator 4.0
- Go to Edit ⇒ Preferences
- Under Advanced, open Proxies
- Select Manual proxy configuration and click on View.
- Under FTP Proxy, Gopher Proxy and HTTP Proxy type in the address
wayback.steptail.com - Under Port type in the port number of your chosen server. Consult the server list and choose a port number.
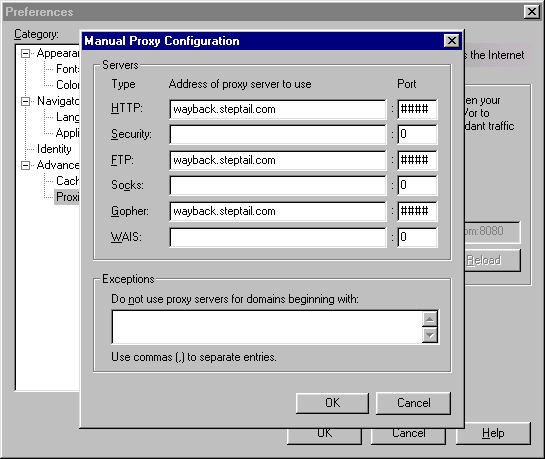
- Hit OK, then OK again to close out of the Preferences window.
- You may begin using the service by navigating to http://welcome.inode.com
Links 2.1
- Press ESC on the keyboard, go to Setup ⇒ Network options
- Hit TAB until Proxies is highlighted and press ENTER
- Type in the following while using TAB to move to the next field.
- Under HTTP Proxy, and FTP Proxy type in the address
wayback.steptail.com:xxxx. Replace xxxx with the current port number of the proxy server. Consult the server list and choose a port number.

- Press ENTER to accept changes. Use TAB to highlight OK, hit ENTER to close out of Network settings.
- You may begin using the service by navigating to http://welcome.inode.com
Questions? Comments?

